

How to MEASURE your room
A few careful measurements now save time and uncertainty later.
This guide walks you through what I need and how to capture it, even without any professional tools or experience.
What you will need
A tape measure, a pencil and paper, and about 20 minutes.
Step 1: Draw a rough outline
Sketch the shape of the room from above, as if looking down on it with the roof removed. It does not need to be to scale or look neat. A simple rectangle or L shape is perfect.
Step 2: Measure the walls
Measure each wall from corner to corner and write the measurement directly onto your sketch, next to the wall it belongs to.
Step 3: Add doors and windows
Mark where every door and window sits along the walls, including which way any doors swing open. Measure the width of each opening (inside the frame) and its distance from the nearest corner.
Step 4: Add fixed features
Mark the position and size of radiators and any built in cabinetry, chimney breasts or alcoves. Then add positions of sockets and light switches. These all affect how a room can be laid out, so it helps to include them even if you think they are not relevant.
Step 5: Note the heights
Ceiling: a single measurement from floor to ceiling is enough, unless the ceiling is sloped or vaulted, in which case a note of the lowest and highest points is useful.
Windows: measure the height of the window itself, along with the distance from the floor to the sill.
Doors: measure the height of the door itself, and note the width of the doorframe so I get the full picture.
Step 6: Photograph the room
Take a few photographs from different corners, along with one from the doorway looking in. Photographs help me understand proportion, light and existing finishes in a way a sketch alone cannot.
Step 7: Measure any furniture you want to keep
For each piece, measure the height, width and depth in centimetres, and note which room it belongs to. Include a photograph of each item together with its measurements.
Please provide your measurements in metric, preferably centimetres or millimetres.
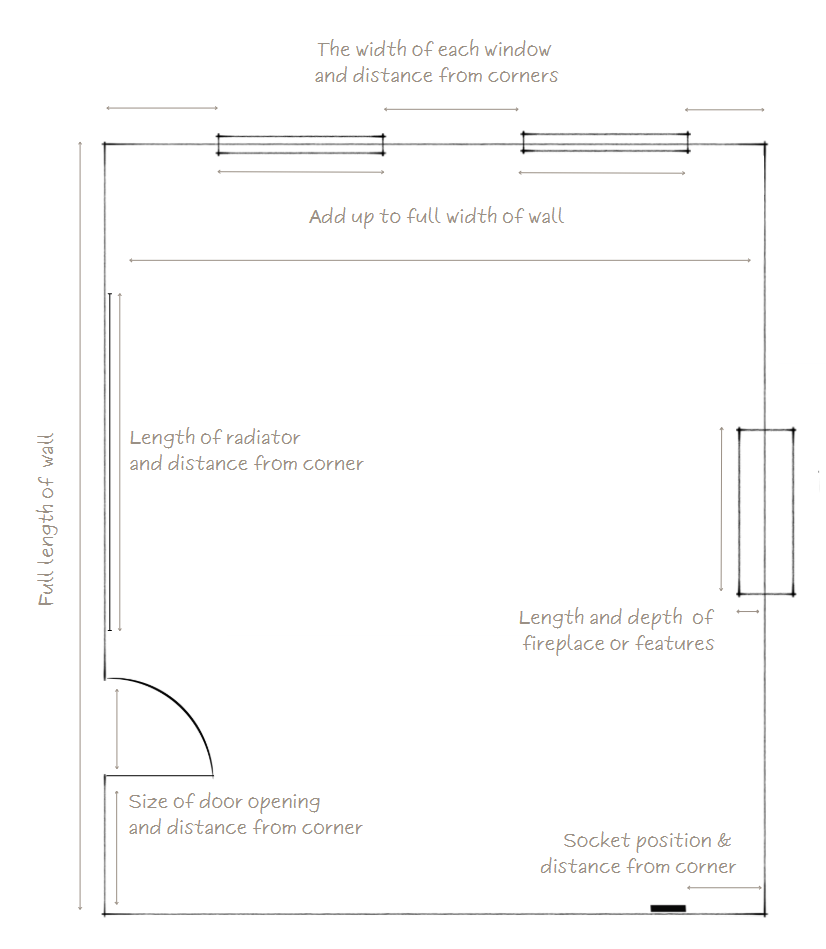
Once complete, upload your sketch and photographs using the form.
If anything is unclear or you are unsure of a measurement, a rough estimate noted as such is still useful. I can always follow up if I need anything more precise.